We have the week off from the basement because we hired out the labor to have our dry wall hung and finished. So, the obvious thing would be to sit down and relax, right? Not us! With Chad on spring break this week and me having an impromptu day off on Wednesday, we decided to tackle our guest bedrooms that needed a major makeover.
Although I painted these rooms shortly after moving in (here's the post), they had no "design" what-so-ever. Honestly, they were a little piecemeal and thrown together with an assortment of hand-me-down furniture. So, we started to give them a little makeover while we both had the day off.
Bedroom #1 is painted a yellow color (left over from our downstairs), it had a queen bed in it, my dresser from college, a TV stand (although there is no cable in this room) & one end table and lamp from my childhood bedroom set. Complete with mismatched sheets and a comforter that we had laying around, curtains that were left from the previous owners and a that floor lamp! It was a little disheveled.
Note: The dresser and TV stand are behind me where I am standing.
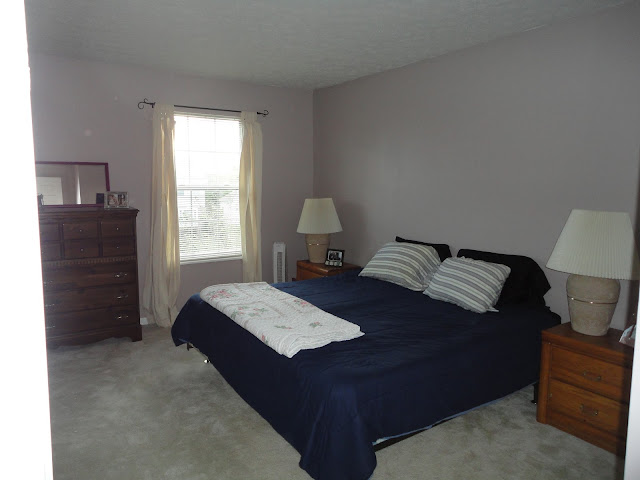
Bedroom #2 looked a little like this...
Where do I begin with the ugliness? The lamps? The curtains? The comforter? The pillowcases? The sheets that don't match? The end tables that are 20 years old? The old dresser? The ratty curtains?
The color in this room is a neutral grey (also left over from downstairs). The room was equipped with hand-me-down end tables, curtains from the previous owners, sheets and comforter that were pieced together, lamps that I'm nearly positive time traveled straight out of the 80's and chad's childhood dresser that needs a good refinishing.
The first step in this makeover was buying new sheets and comforters for the beds. Here is where Target enters the scene (best store ever)! Then we decided on a little design aspect: The king bed did not fit well in that room. Since it was really two twin mattresses on a king bed frame and we happen to have another frame in the basement, we decided to split them into two twin beds. And, you remember my post a couple weeks ago about updating the end tables. We basically switched everything from one room into the other and well it's easier seen than said so without further ado...
Here is the new and improved, but not yet complete bedroom #1!
Updates: painted the end tables white, new comforters and sheets (I actually had the teal set from college, so we only bought the yellow set), new curtains and new lamps.
It's not finished yet though. We still need: Wall art, to paint the dresser the same white as the end tables, possibly headboards & installing ceiling lighting (and possibly a rug, it's still under debate).
I think it looks 100 times better. The white furniture looks great with the wall colors as well as the comforters. And now we have three beds instead of just two! =)
The comforters, yellow sheets & grey curtains are from Target (from the Room Essentials collection). The bed skirts and table lamps are from Ikea. Paint and hardware for the end tables is from Lowes (we have enough leftover for the dresser, too). Total cost of this room was around $100.
Here is the new and improved (also not quite complete) bedroom #2!
Updates: new comforter and sheets, curtains and wall art.
We still need to paint the end table black to match the other furniture, install ceiling lighting, hem the curtains & possibly a head board and more wall art for the long wall on the left.
I also love this room so much more! I think the smaller bed in here makes the room look so much bigger! It obviously made sense to put the TV in the room with cable. Now our guests can watch TV!
The comforter and sheets are from Target (Room Essentials collection), the curtains are from Ikea and the wall art is from Home Goods. The total for this room was around $50.
I feel like these rooms actually look like they have a little design to them now. They aren't completely embarrassing anymore. They have a nice mixture of newly purchased touches as well as updated hand-me-downs. Overall, we gave the space a new, re-purposed and functional look.
Once we finish with the updates we still need to make I will post Guest Bedroom Makeover: Part 2!
Have a good Easter weekend!


No comments:
Post a Comment