Pages

Sunday, March 31, 2013

Happy Easter!

Happy Easter Everyone! 


We are spending this Easter with Chad's family, up in Chad's hometown so, Chad got his Easter basket yesterday! I decided to take a page out of Jessica's book over at Little baby garvin and make Chad a cool Easter basket out of a beer case. 

I bought a 6 pack of Chad's favorite beer, Angry Orchard (it's actually hard cider). I removed three of the beers out of one side (for drinking later).

I pushed the separators out of the way and stuffed it with Easter grass.


I added some candy and goodies that he likes (I can't promise I didn't eat some of it while assembling). And that's it! Easy as pie! You could add some decoration on the actual box, like Jessica did, but I chose the easy way out!


Enjoy your Easter!

Thursday, March 28, 2013

Guest Bedroom Makeover: Part 1

We have the week off from the basement because we hired out the labor to have our dry wall hung and finished. So, the obvious thing would be to sit down and relax, right? Not us! With Chad on spring break this week and me having an impromptu day off on Wednesday, we decided to tackle our guest bedrooms that needed a major makeover. 

Although I painted these rooms shortly after moving in (here's the post), they had no "design" what-so-ever. Honestly, they were a little piecemeal and thrown together with an assortment of hand-me-down furniture. So, we started to give them a little makeover while we both had the day off. 


Bedroom #1 is painted a yellow color (left over from our downstairs), it had a queen bed in it, my dresser from college, a TV stand (although there is no cable in this room) & one end table and lamp from my childhood bedroom set. Complete with mismatched sheets and a comforter that we had laying around, curtains that were left from the previous owners and a that floor lamp! It was a little disheveled. 


 Note: The dresser and TV stand are behind me where I am standing.

Bedroom #2 looked a little like this...


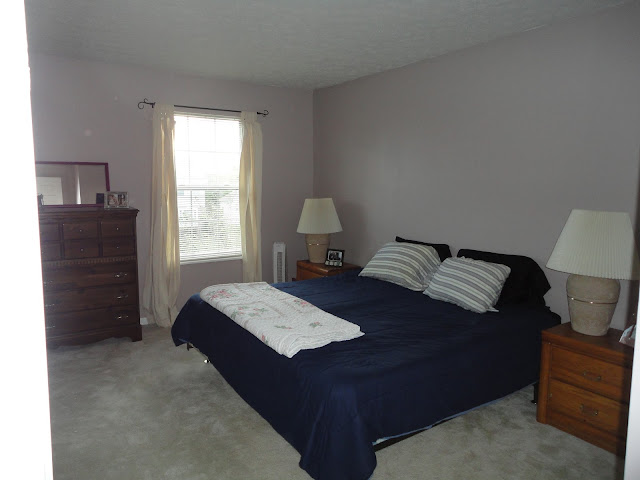
Where do I begin with the ugliness? The lamps? The curtains? The comforter? The pillowcases? The sheets that don't match? The end tables that are 20 years old? The old dresser? The ratty curtains? 

The color in this room is a neutral grey (also left over from downstairs). The room was equipped with hand-me-down end tables, curtains from the previous owners, sheets and comforter that were pieced together, lamps that I'm nearly positive time traveled straight out of the 80's and chad's childhood dresser that needs a good refinishing.

The first step in this makeover was buying new sheets and comforters for the beds. Here is where Target enters the scene (best store ever)! Then we decided on a little design aspect: The king bed did not fit well in that room. Since it was really two twin mattresses on a king bed frame and we happen to have another frame in the basement, we decided to split them into two twin beds. And, you remember my post a couple weeks ago about updating the end tables. We basically switched everything from one room into the other and well it's easier seen than said so without further ado...

Here is the new and improved, but not yet complete bedroom #1! 


Updates: painted the end tables white, new comforters and sheets (I actually had the teal set from college, so we only bought the yellow set), new curtains and new lamps.


It's not finished yet though. We still need: Wall art, to paint the dresser the same white as the end tables, possibly headboards & installing ceiling lighting (and possibly a rug, it's still under debate).

I think it looks 100 times better. The white furniture looks great with the wall colors as well as the comforters. And now we have three beds instead of just two! =)


The comforters, yellow sheets & grey curtains are from Target (from the Room Essentials collection). The bed skirts and table lamps are from Ikea. Paint and hardware for the end tables is from Lowes (we have enough leftover for the dresser, too). Total cost of this room was around $100. 

Here is the new and improved (also not quite complete) bedroom #2!


Updates: new comforter and sheets, curtains and wall art. 

We still need to paint the end table black to match the other furniture, install ceiling lighting, hem the curtains & possibly a head board and more wall art for the long wall on the left. 


I also love this room so much more! I think the smaller bed in here makes the room look so much bigger! It obviously made sense to put the TV in the room with cable. Now our guests can watch TV! 

The comforter and sheets are from Target (Room Essentials collection), the curtains are from Ikea and the wall art is from Home Goods. The total for this room was around $50.


I feel like these rooms actually look like they have a little design to them now. They aren't completely embarrassing anymore. They have a nice mixture of newly purchased touches as well as updated hand-me-downs. Overall, we gave the space a new, re-purposed and functional look. 

Once we finish with the updates we still need to make I will post Guest Bedroom Makeover: Part 2!

Have a good Easter weekend!  


Sunday, March 24, 2013

Basement Renovation: Loose Ends

There wasn't a really good title for this weeks blog post, since mostly we did a random array of things in order to finish up lighting, electric and framing. So that's way I just titled it "loose ends," since we are tying together and finishing up the things we've been working on the past 3 weeks.  Therefore, this post will be a bit boring and random. Enjoy! =)

First thing we did this weekend was cut a hole in the side of our house! YAY! 


Here is the long story as to why this had to happen. Dry wall sheets come in 3 sizes, 4x12, 4x10 and 4x8. The larger the size of drywall the cheaper it is to have it hung and finished (they charge per sheet), the better the finished product looks (less seams) and the actual dry wall is cheaper. So, we obviously wanted the 4x12 sheets of drywall. However, they would never fit down our stairs with the sharp turn at the bottom. Can you imagine the wheels turning in my dad's brain? Leave it to him to come up with this one. "Let's just cut a hole in the side of the house," he said. Cue, Chad and I's wide eyes and scared faces. But it really did work out perfectly. 

Our dry wall was delivered Saturday morning. Luckily the rain/snow/sleet held off. What is up with this weather? Seriously, it's almost April! I've had enough of winter! Sorry, back to the basement.


One of the guys Chad works with was amazing and kind enough to come help us move the drywall. We set up long pieces of board as our "slide" and just slid the dry wall down. My dad and I were at the bottom to catch and stack them.


It only took us about an hour to slide all 55 sheets of drywall down into the basement. It was pretty neat! Props to dad for his ingenious idea! Once it was all inside, he fixed our house. Don't worry, it looks just like it did before, siding-mold and all!
  

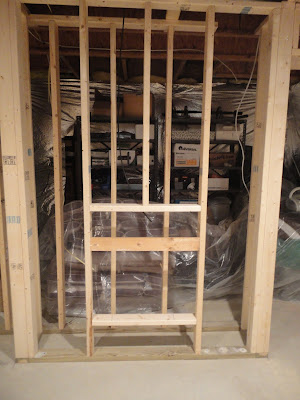
Then we built the back wall where the built in shelves, TV and fireplace are going to go (above). 


We finished up all the lighting (FINALLY)! Above are the two small can lights by the TV. 

Side note: We changed up our lighting plan a bit. Instead of 4 lights by the TV (2 in front of the TV and 1 on each bookshelf), we decided to eliminate the two on the bookshelves and do lighting INSIDE the bookshelves. This is mostly because of the ceiling drop we have on the one side, there was no where to put the light for that bookshelf. This will look much better. 

We also decided to eliminate the 2 small can lights above the shelves in the bar area. This is mostly because the window is not centered and anywhere we would put lights in the ceiling would be off center and look funny. We will just have the track light, 3 large cans and also lighting on the shelves themselves  It will still be plenty of lights!


Something fun: We randomly found a wire in our ceiling that was just dangling there (above). Upon further inspection it had the word "Island" written on it. Apparently, when the house was built it was supposed to have an island in the kitchen with an outlet in it. Well our kitchen was NOT built with an island, but when we remodeled it last year we put an island in. We have always thought, "we should have put an outlet in the island". So when we found this, it kinda made our day! All it took was drilling a hole in the floor. (Okay, it took a little more than that). Now we have an outlet in our kitchen island! 


Back to the basement! I really keep getting off track today, don't I! Sorry. We ran all the cable wires and secured them near the breaker box (above). 


We ran the ducting for the exhaust fan (above). Sorry that's a "before" picture and I didn't take an after. Shame on me! Just imagine a big shiny metal tube coming out of that black hole and going to the outside of our house. So, I guess we cut 2 holes in our house this weekend, geeze! 

Other things we checked off our list: I filled all the holes from wires going from our basement outside our house with this fun foamy stuff. Another side note, (sorry, I can't help myself) don't get that stuff in your hair, it doesn't come out easily! We ran the two heat ducts. We pulled speaker wiring, in case we want to do ceiling speakers, if we have surround sound. I cleaned, as usual. But my cleaning paid off because I found some stuff we can return! Yay (see below)!

This Weeks Costs
Speaker wire - $19
Ducting - $55
More electric stuff - $24
Studs for the fireplace wall - $70
Insulating foam (a.k.a fun foamy stuff) - $5

Returns
5 small can lights - $95
10 feet of copper piping - $10
PVC - $3
Gas line pipe - $7

Free Things that were we already had
Nail gun
Ducting tape
Labor
Exacto Knife
Wire cutters

This weeks total - $173

Returns - $115

Project total - $2,589

Things I learned this week:  Don't get the foamy stuff in your hair! Chad says, "dry wall sheets are extremely heavy and awkwardly floppy!" Note: I did not carry any of these, because I'm weak and a wimp! Perks of being a girl! =)

This weeks plans: All our hard work this weekend was in order to get the basement prepared for the dry wall people. They are coming on Tuesday and they should be finished by Saturday. Chad will get to spend his spring break baby-sitting them. Yay!  

I am not a professional and all my advice and tips are purely from my own experiences. 


Sunday, March 17, 2013

A Week in Review: Coat Closet and End Table Makeover

Happy St. Patrick's Day! Here's to Good Luck! 


So, what's new in the Blackburn house this week? We pretty much took the week off from the basement. Just a few updates: We finished the hallway lighting early in the week and our fireplace was delivered! We couldn't wait to plug it in and we absolutely LOVE it. (sorry for the horrible picture quality but doesn't it look amazing!)


Anyways, with the basement on hold, we spent this weekend doing odds and ends. 

First, I painted the coat closet in our entry way. We didn't paint any of our closets when we moved in. Probably because we were so sick of painting we thought, screw it, we'll just shut the doors. No one looks in the closets anyways. Well, that's true, but now I'm annoyed every time I look in the closet and its a mess. The walls were literally colored on with crayon and scratched all up.  


First things first, half the stuff in the closet needed to be 1) thrown out 2) donated to goodwill. So I went through all the junk and threw some stuff away. 


Then it was nice and clean. I wiped down the dirty walls and found the paint in our garage that matched the entry way and went to work. 


After two coats and allowing it to dry, I hung the shelf back up and attached a couple hangers to the inside of the door for scarves. 


I found cute (and cheap) bins at Target that fit perfectly on the shelf. I threw all our hats in one and all our gloves in the other. This hid the mess and also gave us a "home" for all those things that ended up laying around the house.  I'm thinking about putting some cute labels on the bins so we know which is which.


Then I just reassembled the closet. Much better!


Next project: Most of our furniture is hand-me-down, which is great since it was FREE! However, it's not always attractive. So, for almost 2 years now we've had these ugly things in our spare bedroom. (They were my grandma's) I'm sure at some point these were the hottest ticket in town. Now, they just look dated.  


However, I'm not going to go out and spend a bunch of money on end tables. So, why not fix up the ones I've got? They work great, they just don't look great! I went to Lowe's and bought a couple cans of spray paint and new hardware and then went to work.


After one coat they looked pretty good, but you could definitely still see the wood coming through. Luckily, it was a great day outside. After the second coat they looked great! 


Although I cleaned them well and sanded off the glossy top coat, these babies have seen better days. There is some water damage on both table tops and it shows a bit even through 2 coats of paint. Oh well...


I waited a couple hours and attached the new hardware! They look so much better than before! 


Hope you have a Happy St. Patty's Day. Go make some green pancakes like we did! =)


Sunday, March 10, 2013

Basement Renovation: Lighting

We continued on with our electric this week and got some more lighting done. We officially have lights! Wiring the play room was the hardest because it has 2 switches which can both turn the lights on and off. This required special wires, wiring and switches (and took us most of the day to do). But none the less, it is done and we have lights in the play room (below). We have 4 can lights, and it is wired for a light/fan as well, in case we ever decide we want one in there.  


Then the rest of the can lights were much easier and simpler. We have all of our large can lights up in the main area and the entertainment area, there are 10 total! (below) Two of the can lights don't have bulbs in them (I didn't buy enough).


Notice it is nice and clean! That is what I spent most of my day doing! It was a MAJOR mess and so I swept and used the shop vac and organized tools. It looks so much bigger!


We have 4 new breakers and our breaker box is FULL! 

Chad spent some of his day prepping for dry wall by nailing in "blocks" in corners and on ceilings so the dry wall has something to be screwed to.  He also anchored all of our copper piping, so it won't rattle around and ran the cable wires for the TVs.


We left most of the wiring (okay, all of it) to the expert (my dad) and we mostly cleaned and made ourselves look busy. We did however, go around with an exacto knife and strip all the wiring down to make my dad's job a little easier. This resulted in the first injury of the Blackburn Basement Renovation. I sliced my finger =( It's not bad though, a couple band-aids and I was back at it. They aren't kidding when they say those razor blades are sharp! Anyways, we hooked up the light switches and voila, "let there be light!"


 Once we had new lights hooked up and working, we were able to take the old lights down, this was fairly simple and quick. Then we used the wiring that we took down from these lights and ran the wire for the bar lights. We can't hang two of our bar lights because....well.... long story short we are cutting a hole in the side of our house to get the dry wall in (I'll explain later) and the lights would be in the way, if they were hung. 

We did buy our electric fireplace as well this past week (above). We got it for a deal. It's the most "real" looking one we could find. It was important for it to have all the safety features and the different temperature settings, which it does. 

Wiring takes a long time, and it doesn't seem like you've done much after working for an entire day. I think I said this last week, but I'm reiterating it! We still have to hang the small can lights in the entertainment area and the two in the bar I mentioned above as well as the lights in the storage room and the HVAC room. We have all the lights hooked up that we need at this point (except the hallway/stairs) and will probably wait until after drywall to hook the rest up. Apparently, that's how it's normally done anyways (dry wall first, then lights). I didn't know that, but since we needed lights to work, we had to do it the other way around. 

We are taking next weekend off, my dad is going out of town. But we will be back at it the weekend after that. We will be recruiting some friends to help us move dry wall into the basement (through the hole we are cutting in the side of our house....). I'll let you know how that goes. But hopefully this week before he leaves, he can get the last of the can lights hung so we can pull wire to them and finish the lights in the hallway. Then we will be done with lighting/electric for the time being.

This Weeks Costs
Connectors for the can lights - $10
Switches - $30
Another Breaker - $7
More work boxes - $ 6
Fireplace - $168

Free Things that were we already had
Nail gun
Nails
Cable
Some wire
Drill & bits
Hammer
Wire Staples
Tape Measure 
Labor

This weeks total - $221

Project total - $2,531

Things I learned this week - Be careful when using an exacto knife! Also, I would be lying if I didn't claim to have learned a thing or two about wiring. I paid attention a little =) but it's very confusing.

To do list from last week:
1) We have to prepare for dry wall. This requires nailing in blocks (small pieces of wood) on corners and ceilings so the dry wall has something to be nailed to. 
2) Run the two heat ducts. 
3) Decide on our plan/design for the secret bookshelf-door and frame it. 
4) Anchor the new copper pipes and the a/c line so they don't rattle. 
5) Finish the electric
6) Buy the electric fireplace
Add ons:
7) Buy dry wall and move it to the basement.

I am not a professional and all my advice and tips are purely from my own experiences. 


Tuesday, March 5, 2013

2013 Book List

I have a HUGE book list to read this year. I'm sure it will take me well into next year. Again, it is full of a lot of series books and a lot of books made into movies. It's a mixture of fantasy, adventure, sci-fi, and young-adult. So without further ado, here is my 2013 book list.


1) City of Ember by Jeanne Duprau - This is the first of a 4 book series called (what else) The Books of Ember. It was recommended by none other than my husband. It's a children's book, so it should be a fairly quick, easy read. It's also a movie, which I will watch after reading it.


2) Extremely Loud and Incredibly Close by Johnathon Safran Foer - This book is about a post-9/11 family that lost their husband/dad/son. I have not seen the movie yet, but I do love books that are made into movies. So, when I saw this I added it to my list!


3) City of Bones by Cassandra Clare - This is the first of a 6 book series call The Immortal Instruments. It was recommended by a co-worker and it's also on several must-read lists I've seen. It is a sci-fi/fantasy type book about people that hunt demons called "shadowhunters" and a girl that gets thrown into their world.


4) Gone Girl by Gillian Flynn - This was recommended by a friend. She really loved it, however, I have another friend who just thought it was okay. So, we will see. It's about a man whose wife gets killed and he is under investigation for her murder.


5) Divergent by Veronica Roth - This book was recommended by the same friend who recommended Gone Girl. Another young adult fantasy/adventure type book. It is the first book of a trilogy called the Divergent series (only the first 2 books have been released).


6) Beastly by Alex Flinn - This was on a must-read list that I came across. It is supposedly a modern-day Beauty and the Beast story. I also recently found out it was a movie, so that made me excited!


7) The Game of Thrones by George R.R. Martin - Who didn't recommend this book to me? That's the easier question. This is a sci-fi fantasy series of 7 books (only 5 of which have been released) called the Songs of Fire and Ice series. They are really big books, I sense some procrastination here on my part..... It's also an HBO series that I don't watch. Who knows, maybe I will after reading the books!


8) The Giver by Lois Lowry - This is another book that Chad recommended to me. He read it in high school and loved it. Surprisingly, to everyone that I've talked to that's read this book, it is the first book in a 4 book series called The Giver Quartet. Obviously, it's not a book that leaves you needing to read the next book. It's a young adult fantasy book about a boy that receives special training from "the giver".


9) Beautiful Creatures by Kami Garcia & Margaret Stohl - This is a recently released movie. Chad heard from women at his work that it is a good book, so I added it to my list. It's a sci-fi book about a young witch that falls in love with a mortal boy. (Twilight anyone?) It is the first book in a 4 book series called, none other than, The Beautiful Creatures series.

There you have it, my 2013 book list. I have my work cut out for me. It's only 9 books long, but that's only if I can keep myself from reading all the sequels, which is unlikely. If I include all the sequels its almost 30 books, which is not gonna happen! I am shooting for a book a month and so far I'm on track (even a little ahead of schedule). I'll let you know what I thought of the first couple I've already read this year, so, stay tuned!

Let me know if you have read any of these books and what you thought! Also let me know of any of your recommendations I should add to my list (because my list isn't long enough #sarcasm)!