Pages

Sunday, April 28, 2013

Life Lately: Where has April Gone?!?

Where has April gone? I cannot believe how time is flying by and it's almost May!! So, it's been 2 weeks since I posted and we have officially taken 3 weeks off from working on the basement. Good news: Spring is HERE! Thank the Heavens!


So what have we been up to? Being completely lazy and sitting on the couch all day. Well, for starters, we have been hard at work putting the finishing touches on the spare bedrooms. Chad was able to find a great deal on Craigslist for a headboard that works great on the queen bed. All he had to do was paint it black to match the rest of the furniture in the room. He also took the end table that was in that room and painted it black and added new handles. Everything looks like it goes together now!


The headboard Chad got on Craigslist came with a mirror as well. We found some paint that matched the teal color on the bedspreads and it adds a nice "pop of color" as they say on HGTV. =)


I decided to try my hand a being artistic (risky, I know!) and make a little piece of artwork to hang on the wall. For being completely terrible at all things artsy, I think it turned out quite well! These are lyrics from the song Chad and I danced to at our wedding. Michael Buble - "Hold On". It says, "we are stronger here together, than we could ever be apart."


Also, Chad slapped a coat of white paint on the dresser and made it match the other furniture in this room. Also, new handles and it looks much better. This dresser was a little harder to salvage than the other pieces we refinished. It didn't take the paint well and even in the picture below you can see that it looks slightly "pink" because the wood was absorbing the paint and showing through in spots. But, for the purposes we need it for, it's going to work just fine!


The bedrooms got their first use last weekend when we had Chad's family in town. We even got to use the blow-up mattress I said we needed and so badly wanted (and got!) for Christmas. We had a fun weekend full of fried food and alcohol. But also, fun times with great family, so it was worth it! I love a good piano bar and an amaretto sour with some of my favorite people! =)

Other than that, we have mostly been enjoying this weather, trying to get back to the gym as much as possible before bikini season, and just plain old relaxing! Relaxing is key because we have a summer (yes it's almost summer!) that is completely BOOKED! I was looking at our calendar and every weekend from now until September is nearly booked with fun things to do! It seems this is just how summers are and I love it! But it does make the summers go by too fast and leaves me wishing I had had more time to do this or that! We will try to make the best of it and enjoy it while it lasts! 

Things on the agenda for this summer:

Bachelor/Bachelorette Parties (possibly to Nashville!). Reds Games. Birthdays (the big 25 for me!) and birthday parties: I can't believe my niece and nephew will be 8 and 11! I feel old! Bridal Shower, which I'm hosting! 

Also the big things- 
Maine! We are going to Houlton, Maine for 4 days in June for a good friend's wedding. Chad is actually a groomsmen in it. It will be a lot of fun to see a new place and celebrate with close friends. Also, then I can say I've been to a place I've never been or thought I would ever go, Maine! I bet it will be beautiful (the bride and the place!)

Hilton Head! We are taking our family vacation this year to one of my favorite places, Hilton Head, SC! We are going for almost 8 days in July! I went here nearly every summer as a kid and had so much fun. Chad has never been so I'm excited for him to experience it. Also, how could sun, sand and a pool ever be bad!?

Lexington! My bestest friend in the whole world is getting married and I'm her Matron of Honor! I'm so excited for this wedding that has been in the works for nearly TWO YEARS and it is FINALLY almost here! 

Needless to say, it will be an action packed summer full of fun, fun, fun! We are kicking things off with another Blackburn family weekend this weekend. Chad's family is coming down to celebrate my in-laws birthdays'. I see a trip to the new casino in our future (also probably more fried food) I better get to the gym! =)

Did I mention we have a basement to finish??

Sunday, April 14, 2013

Project {Garden}: Part 1

Basement plans are slowing down as the weather gets warmer and we get busier. But, that just gives us time to work on other areas of the house that need a little TLC.

If you saw my yard post last year, you know my yard is a mess.

We did mulch and did some planting last summer: I got some tomato plants that my grandma started for me, some onions and strawberries. I planted them in the dead space we had in our back yard and they did not do well. I am pretty sure that our soil is bad.

I also planted some hostas and we removed one of our rose bushes that was taking over our patio. This year, I have a master plan and this week we tried to execute part 1 of that plan!


Above is the spot where I planted my hostas last year. I have decided to move the hostas closer to the patio and kind-of bunch them together, instead of having them spread out. I was surprised to see that they were already coming up and they had survived last year. I was convinced I had killed them after seeing them shrived and burnt at the end of the season.

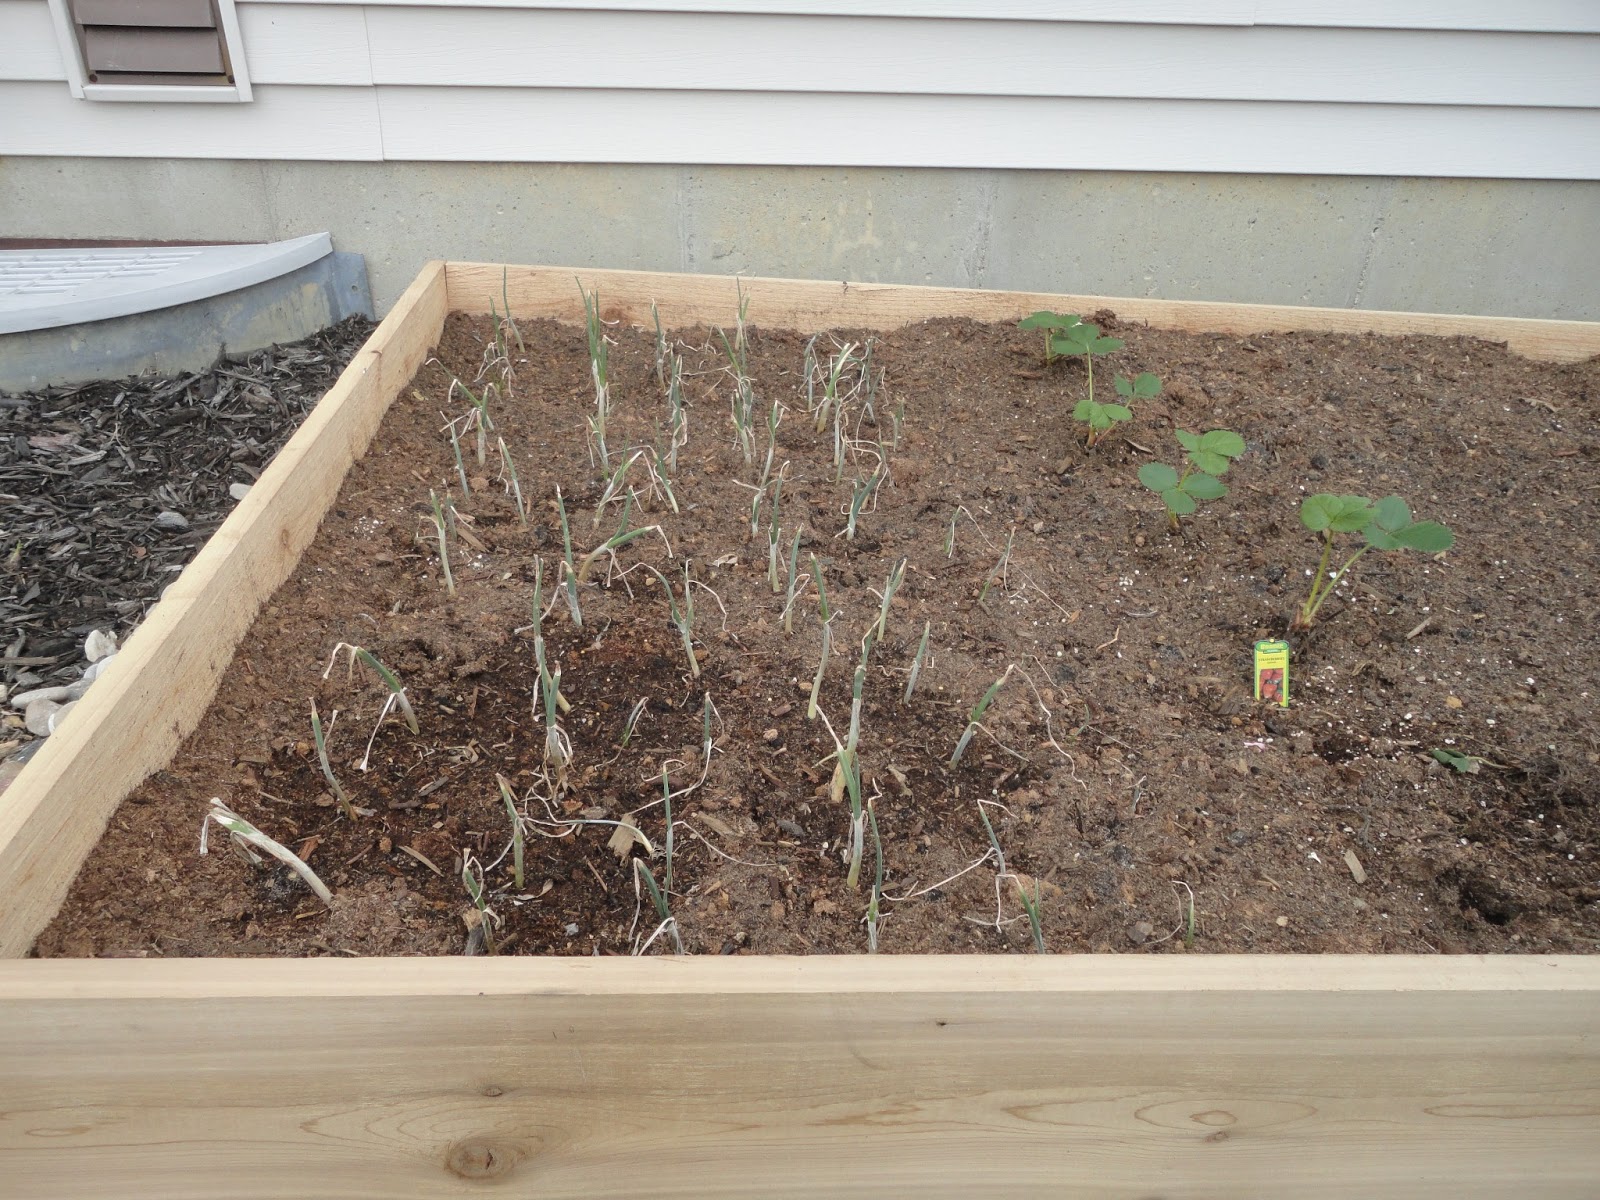
The biggest decision/project this year was a raised garden bed. I decided to do this because our soil is too rotten to plant in {which I found out the hard way}. But, I really wanted to have a garden. The easiest {and cheapest} way I found to get a raised garden bed is to build it out of cedar boards, DIY style.


I went to Lowe's and bought three 1x8x8 cedar boards and had them cut one board in half so I had two 1x8x8 boards and two 1x8x4 boards. This would give me an 8 foot by 4 foot raised bed.

Chad helped me screw the boards together and voila we had a garden bed!


I had already put a weed barrier down last year that was still very much intact so I was able to just put the bed down on that with no prep work.

I bought a combination of peat moss, garden soil and compost/manure mixture. To fill my 8'x4' bed I used 4 cubic feet of garden soil, 6 cubic feet of peat moss and 3 cubic feet of compost/manure mixture. We mixed it all together using a garden hoe. I also mixed in a little plant food {below}.


I was seriously behind on planting my onions. This is supposed to be done at the beginning of March. So this was the first thing I planted. Last year, a mixture of bunnies and our awful soil {are you sick of me mentioning that yet?} was the demise of the onions. One day, I went out and all the onion tops were gone! Eaten by Peter Rabbit himself, I'm sure! I planted A LOT of onions {over 60} in hopes that the bunnies share and we at least get a couple this year.  These can be planted fairly close together (4'' apart) so I was able to fit a lot of onions in a small area.


Strawberries are supposed to be planted about this time of year, too. So I went ahead and planted those while I was at it. Here is my dilemma with strawberries. Chad really wants them. I planted them last year {yeah, you guessed it - shitty soil} and they didn't survive. I FINALLY had one strawberry beginning only to come out and see that it had been eaten along with the onions! I was sad. None-the-less I've decided I will give it ONE more shot this year. If these don't work, I'm giving up! So we have 4 strawberry plants next to the onions.


It was also time to plant Rosemary and Thyme but WAY too early to plant my other herbs: basil, oregano and cilantro. I was overly anxious and went ahead and got those, too. I may be kicking myself when they die because it still going to be in the 30's at night around here. I was quickly running out of room in my raised bed and only put the thyme and rosemary in the bed. The others got their own little green pot. Cute huh?


I have tomatoes plants coming from my grandma and also some bell pepper plants this year. I won't plant these until after Mother's Day though. I am really hoping that this raised bed will solve the problems I had last year and I will at least get ONE tomato {or ANY product from ANY of the plants}!

Lastly, I got some river rock from Lowe's and placed it around the raised bed just to make it nicer to look at.


I will post Part 2 of the Garden Project once the tomatoes and peppers are planted. Also, part 2 will include getting rid of that nasty area we planted in last year on our fence line. {yay, you won't have to hear me complain anymore} We are going to till this land up and plant some grass seed. Hopefully it won't be such an eye sore. I'm sure we will do some mulching like last year. Also, we may or may not be getting a shed this year {depending on the basement budget}. Stay tuned!

Monday, April 8, 2013

Basement Renovation: Paint


This past week was spent painting! Chad and I started Thursday night by priming the ceiling and some of the walls for paint.


Priming has to be done on raw dry wall. If you paint on the dry wall, even with paint + primer, it will just soak into the dry wall. So, they have to be primed with construction primer first.


We were able to finish the ceiling, playroom and bathroom. We used a 5 gallon bucket of PVA construction primer and we have a little of it left over.


Friday, we were at it again. The ceiling had to be painted before we could paint the walls.


We used 2 gallons of ceiling paint to do the entire basement's ceilings.


It looks really nice and only required one coat with the white primer underneath.


After the ceiling was painted, it was time to prime the rest of the walls. The playroom and bathroom were done already. Chad's parents arrived Friday night just in time to help with the priming.


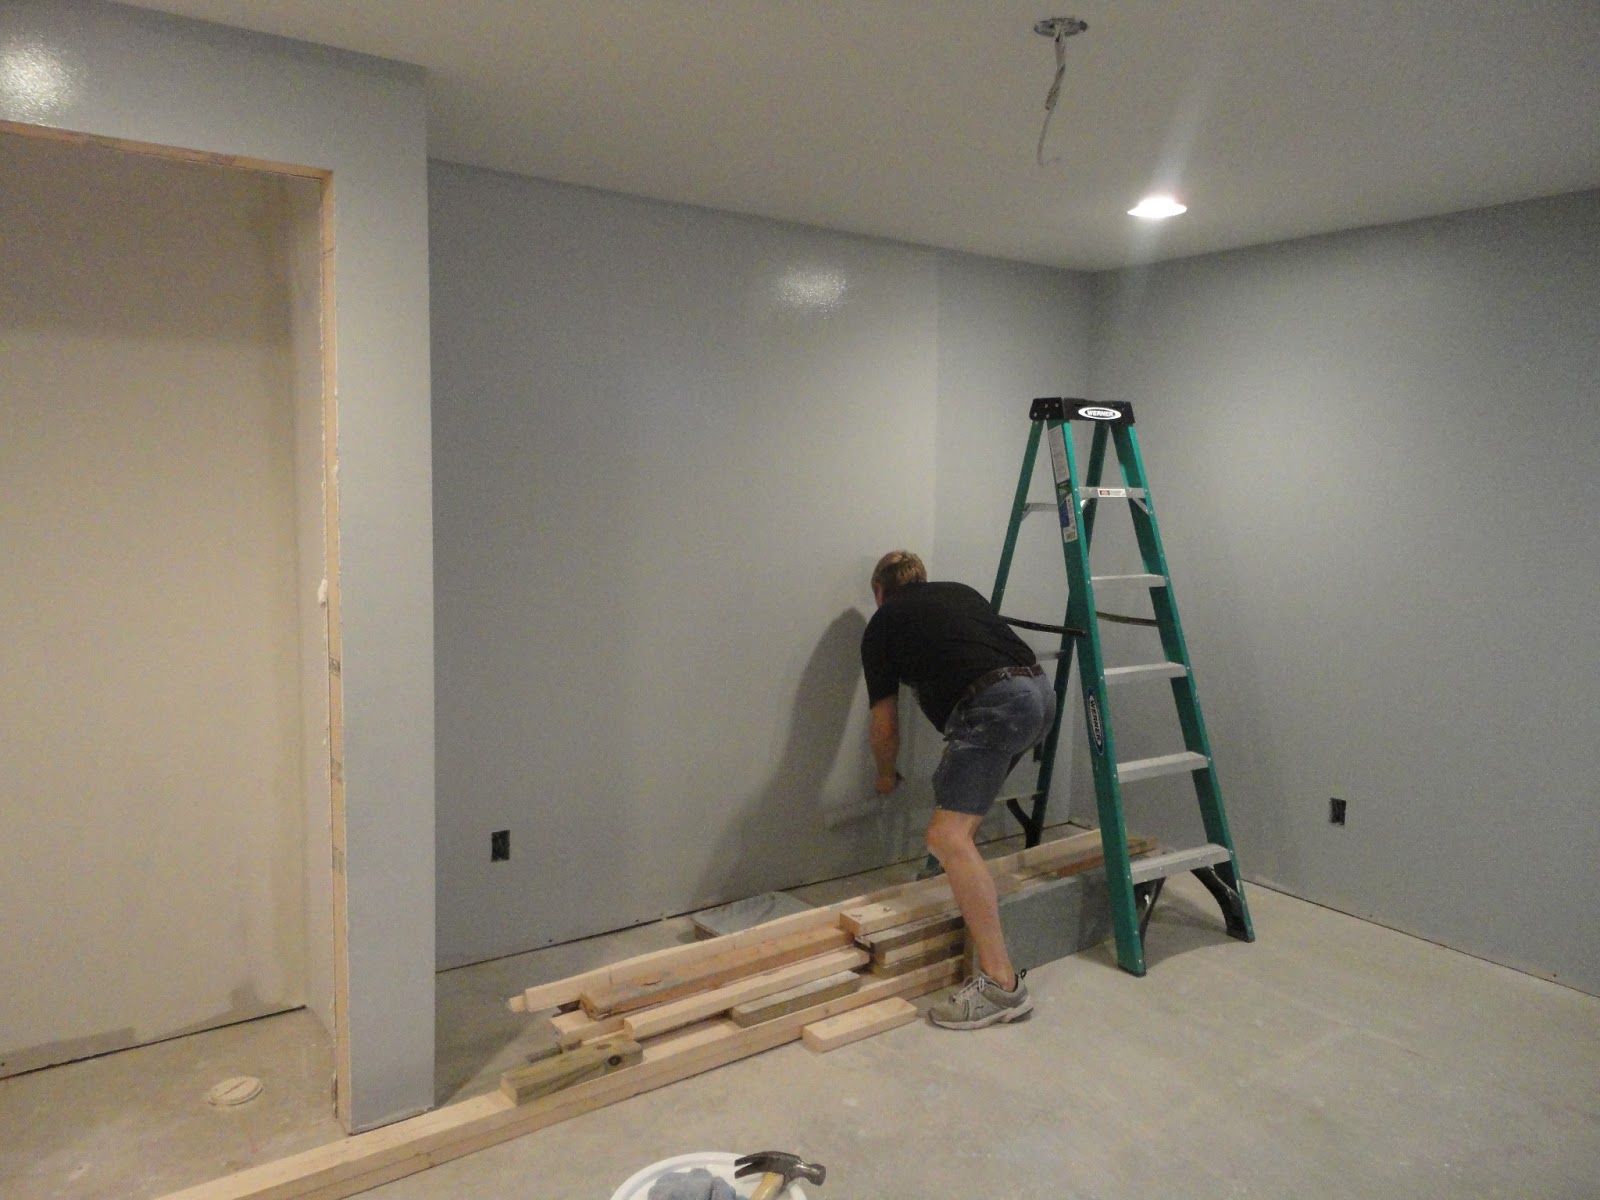
We used a 5 gallon bucket of PVA construction primer tinted to 75% of the paint color. This was supposed to allow us only to have to do one coat of the actual paint (like the ceiling). Unfortunately, we still needed two coats.


We started painting the walls bright and early Saturday morning. The playroom color is called Lunar Eclipse by Olympic.


We used every bit of 2 gallons on this room. This is my favorite color of all the colors we picked.


The bathroom color is called Argent by Valspar. It's just slightly darker than the main color we picked. It will be a nice contrast and look good with a white vanity and accents.


We used 1 gallon of paint and had a little under half left over.


The main color we picked is called London Coach by Valspar. It is a nice neutral color and will go well with dark cabinets and lighter carpet.


We had a 5 gallon bucket and we used pretty much all of it. We needed two coats even though we used the tinted primer, which sucked.


On the back wall we did an accent color called Semi-Sweet by Valspar. I love this color too. I think it goes really well with the other color and is an awesome accent. We only needed 1 gallon of this and we have over half of it left.

Overall it was a pretty successful weekend. I don't want to paint again for a long time, that's for sure. Thanks to my in-laws for coming in town to help us! It was definately a big job and we needed the help! 

This Weeks Costs
10 gallons of Primer and 9 gallons of Paint - $236
Supplies (rollers, brushes, pan liners, etc) - $54

Things we already had
Roller pans
Labor
Some brushes and rollers
Roller frames
Rags
Ladders
Roller extention polls

This weeks total - $290


Project total - $4,839


Things I learned this week:  I don't like to paint. Tinting the primer was kind of a waste of money, since we still needed 2 coats of the paint on top of it. But, we would have had to buy more primer anyways so I guess I'm glad we tried it, now I know.

 
This weeks plans: Tonight we are going shopping for tile and doors. The next step is laying the tile in the bathroom and the bar area. We also need to paint our trim and doors so those can be hung once the tile is down. Good news about the tile is that no sub-flooring needs to be laid!  


I am not a professional and all my advice and tips are purely from my own experiences. 

Thursday, April 4, 2013

Basement Renovation: Dry wall

Hope everyone had a great Easter, sorry I'm late with my usualy Sunday update. It was partially due to Easter and partially I was waiting for the drywall to be complete so I could say IT'S DONE!

This past week was all about dry wall. As I mentioned last week, we had our drywall delivered last weekend. We decided to spend our money wisely and pay to have the dry wall hung and finished professionally. There were several reasons for this. Here are the most important:

First, who knows what it would have looked like if Chad and I had hung and finished it. We wanted our walls to look nice. Especially the ceiling, since we are doing a dry wall ceiling with no stucco (just smooth like the walls).
Second, it's super hard work! Everyone that we have talked to that's hung and/or finished their own dry wall talks about how hard it was. We would have had to ask friends to help us and who knows how long it would have taken.

Which brings me to reason #3, time. Not that we are in any big hurry, but it could have taken us a month to hang and finish the dry wall. The professionals are able to do it in a weeks time. They started on a Wednesday and they finished the following Wednesday (they didn't work on Sunday or Tuesday).


Day one: They spent at least 8 hours hanging the dry wall and got it almost all hung. They only had the bathroom and the play room still to hang. (all of the above pictures were after day 1)


Day two: They finished hanging the rest of the dry wall and they finished the first coat of mud.
This was another long day, about 7 hours.


Day three: This day only required one of the guys to come back. He sanded and put another coat of mud on in about 3 hours.


Day four: Again, only one guy came over this day. All he did was carry all the scrap pieces of dry wall out to his truck and overall cleaned up all their tools and stuff.


Day five: This was another one man, short day. He spent a couple hours putting the last "skim" coat of dry wall mud on the walls.


Day six: This was the last day. We weren't home for this (we had my dad stop over to let them in), so I'm not sure how many people or how long it took. But, they finished the job by sanding everything smooth. 

Other things we did this week:

We started to research sound systems for the entertainment area. We are weighing our options (and there are a lot): In ceiling speakers vs stand alone speakers, all in one sets vs. buying each part separately. 

We went paint shopping which was a LONG trip to Lowe's, picking paint colors is HARD!! Thank goodness we had my parents there to help mediate and tell us their opinons, ultimately Chad picked our main color and the accent wall and I chose the bathroom and playroom colors to flow! My issue is I have trouble visualzing things on the larger scale. I can't picture that small swatch of paint on a large surface area. So it was best that I left the larger areas up to people able to visualized the big picture! You will have to wait until next week to find out the paint colors we chose. I know the suspense is killing you!

This Weeks Costs
Dry wall - $574
Dry wall delivery - $69
Labor (and supplies: mud, tape, etc) - $1275 
 
Things I forgot to put on last weeks costs
Bathroom vent - $13 
More cable stuff - $14
More speaker wire - $15

This weeks total - $1,960

Project total - $4,549

Things I learned this week:  Paying for the labor was well worth it! Not only was it so much better sitting on my couch rather than covered in dry wall mud. But, our walls look 1000 times better because of it!  There are some things that I need to not have control over (i.e. paint). This is better left to people that are good at it (i.e. Chad and my parents)

This weeks plans: This week our plan is to get the entire space painted! Hopefully we like the colors that we picked and we only have to paint once! I guess you'll find out next week! We have family coming over Saturday to join in the painting fun! We first have to mop the floors and wipe down all the walls and ceiling. We have to primer ALL the walls and ceiling. Then we can paint the walls (and ceiling). Sound fun!? Come join! =)

I am not a professional and all my advice and tips are purely from my own experiences. 

Sunday, March 31, 2013

Happy Easter!

Happy Easter Everyone! 


We are spending this Easter with Chad's family, up in Chad's hometown so, Chad got his Easter basket yesterday! I decided to take a page out of Jessica's book over at Little baby garvin and make Chad a cool Easter basket out of a beer case. 

I bought a 6 pack of Chad's favorite beer, Angry Orchard (it's actually hard cider). I removed three of the beers out of one side (for drinking later).

I pushed the separators out of the way and stuffed it with Easter grass.


I added some candy and goodies that he likes (I can't promise I didn't eat some of it while assembling). And that's it! Easy as pie! You could add some decoration on the actual box, like Jessica did, but I chose the easy way out!


Enjoy your Easter!

Thursday, March 28, 2013

Guest Bedroom Makeover: Part 1

We have the week off from the basement because we hired out the labor to have our dry wall hung and finished. So, the obvious thing would be to sit down and relax, right? Not us! With Chad on spring break this week and me having an impromptu day off on Wednesday, we decided to tackle our guest bedrooms that needed a major makeover. 

Although I painted these rooms shortly after moving in (here's the post), they had no "design" what-so-ever. Honestly, they were a little piecemeal and thrown together with an assortment of hand-me-down furniture. So, we started to give them a little makeover while we both had the day off. 


Bedroom #1 is painted a yellow color (left over from our downstairs), it had a queen bed in it, my dresser from college, a TV stand (although there is no cable in this room) & one end table and lamp from my childhood bedroom set. Complete with mismatched sheets and a comforter that we had laying around, curtains that were left from the previous owners and a that floor lamp! It was a little disheveled. 


 Note: The dresser and TV stand are behind me where I am standing.

Bedroom #2 looked a little like this...


Where do I begin with the ugliness? The lamps? The curtains? The comforter? The pillowcases? The sheets that don't match? The end tables that are 20 years old? The old dresser? The ratty curtains? 

The color in this room is a neutral grey (also left over from downstairs). The room was equipped with hand-me-down end tables, curtains from the previous owners, sheets and comforter that were pieced together, lamps that I'm nearly positive time traveled straight out of the 80's and chad's childhood dresser that needs a good refinishing.

The first step in this makeover was buying new sheets and comforters for the beds. Here is where Target enters the scene (best store ever)! Then we decided on a little design aspect: The king bed did not fit well in that room. Since it was really two twin mattresses on a king bed frame and we happen to have another frame in the basement, we decided to split them into two twin beds. And, you remember my post a couple weeks ago about updating the end tables. We basically switched everything from one room into the other and well it's easier seen than said so without further ado...

Here is the new and improved, but not yet complete bedroom #1! 


Updates: painted the end tables white, new comforters and sheets (I actually had the teal set from college, so we only bought the yellow set), new curtains and new lamps.


It's not finished yet though. We still need: Wall art, to paint the dresser the same white as the end tables, possibly headboards & installing ceiling lighting (and possibly a rug, it's still under debate).

I think it looks 100 times better. The white furniture looks great with the wall colors as well as the comforters. And now we have three beds instead of just two! =)


The comforters, yellow sheets & grey curtains are from Target (from the Room Essentials collection). The bed skirts and table lamps are from Ikea. Paint and hardware for the end tables is from Lowes (we have enough leftover for the dresser, too). Total cost of this room was around $100. 

Here is the new and improved (also not quite complete) bedroom #2!


Updates: new comforter and sheets, curtains and wall art. 

We still need to paint the end table black to match the other furniture, install ceiling lighting, hem the curtains & possibly a head board and more wall art for the long wall on the left. 


I also love this room so much more! I think the smaller bed in here makes the room look so much bigger! It obviously made sense to put the TV in the room with cable. Now our guests can watch TV! 

The comforter and sheets are from Target (Room Essentials collection), the curtains are from Ikea and the wall art is from Home Goods. The total for this room was around $50.


I feel like these rooms actually look like they have a little design to them now. They aren't completely embarrassing anymore. They have a nice mixture of newly purchased touches as well as updated hand-me-downs. Overall, we gave the space a new, re-purposed and functional look. 

Once we finish with the updates we still need to make I will post Guest Bedroom Makeover: Part 2!

Have a good Easter weekend!  


Sunday, March 24, 2013

Basement Renovation: Loose Ends

There wasn't a really good title for this weeks blog post, since mostly we did a random array of things in order to finish up lighting, electric and framing. So that's way I just titled it "loose ends," since we are tying together and finishing up the things we've been working on the past 3 weeks.  Therefore, this post will be a bit boring and random. Enjoy! =)

First thing we did this weekend was cut a hole in the side of our house! YAY! 


Here is the long story as to why this had to happen. Dry wall sheets come in 3 sizes, 4x12, 4x10 and 4x8. The larger the size of drywall the cheaper it is to have it hung and finished (they charge per sheet), the better the finished product looks (less seams) and the actual dry wall is cheaper. So, we obviously wanted the 4x12 sheets of drywall. However, they would never fit down our stairs with the sharp turn at the bottom. Can you imagine the wheels turning in my dad's brain? Leave it to him to come up with this one. "Let's just cut a hole in the side of the house," he said. Cue, Chad and I's wide eyes and scared faces. But it really did work out perfectly. 

Our dry wall was delivered Saturday morning. Luckily the rain/snow/sleet held off. What is up with this weather? Seriously, it's almost April! I've had enough of winter! Sorry, back to the basement.


One of the guys Chad works with was amazing and kind enough to come help us move the drywall. We set up long pieces of board as our "slide" and just slid the dry wall down. My dad and I were at the bottom to catch and stack them.


It only took us about an hour to slide all 55 sheets of drywall down into the basement. It was pretty neat! Props to dad for his ingenious idea! Once it was all inside, he fixed our house. Don't worry, it looks just like it did before, siding-mold and all!
  

Then we built the back wall where the built in shelves, TV and fireplace are going to go (above). 


We finished up all the lighting (FINALLY)! Above are the two small can lights by the TV. 

Side note: We changed up our lighting plan a bit. Instead of 4 lights by the TV (2 in front of the TV and 1 on each bookshelf), we decided to eliminate the two on the bookshelves and do lighting INSIDE the bookshelves. This is mostly because of the ceiling drop we have on the one side, there was no where to put the light for that bookshelf. This will look much better. 

We also decided to eliminate the 2 small can lights above the shelves in the bar area. This is mostly because the window is not centered and anywhere we would put lights in the ceiling would be off center and look funny. We will just have the track light, 3 large cans and also lighting on the shelves themselves  It will still be plenty of lights!


Something fun: We randomly found a wire in our ceiling that was just dangling there (above). Upon further inspection it had the word "Island" written on it. Apparently, when the house was built it was supposed to have an island in the kitchen with an outlet in it. Well our kitchen was NOT built with an island, but when we remodeled it last year we put an island in. We have always thought, "we should have put an outlet in the island". So when we found this, it kinda made our day! All it took was drilling a hole in the floor. (Okay, it took a little more than that). Now we have an outlet in our kitchen island! 


Back to the basement! I really keep getting off track today, don't I! Sorry. We ran all the cable wires and secured them near the breaker box (above). 


We ran the ducting for the exhaust fan (above). Sorry that's a "before" picture and I didn't take an after. Shame on me! Just imagine a big shiny metal tube coming out of that black hole and going to the outside of our house. So, I guess we cut 2 holes in our house this weekend, geeze! 

Other things we checked off our list: I filled all the holes from wires going from our basement outside our house with this fun foamy stuff. Another side note, (sorry, I can't help myself) don't get that stuff in your hair, it doesn't come out easily! We ran the two heat ducts. We pulled speaker wiring, in case we want to do ceiling speakers, if we have surround sound. I cleaned, as usual. But my cleaning paid off because I found some stuff we can return! Yay (see below)!

This Weeks Costs
Speaker wire - $19
Ducting - $55
More electric stuff - $24
Studs for the fireplace wall - $70
Insulating foam (a.k.a fun foamy stuff) - $5

Returns
5 small can lights - $95
10 feet of copper piping - $10
PVC - $3
Gas line pipe - $7

Free Things that were we already had
Nail gun
Ducting tape
Labor
Exacto Knife
Wire cutters

This weeks total - $173

Returns - $115

Project total - $2,589

Things I learned this week:  Don't get the foamy stuff in your hair! Chad says, "dry wall sheets are extremely heavy and awkwardly floppy!" Note: I did not carry any of these, because I'm weak and a wimp! Perks of being a girl! =)

This weeks plans: All our hard work this weekend was in order to get the basement prepared for the dry wall people. They are coming on Tuesday and they should be finished by Saturday. Chad will get to spend his spring break baby-sitting them. Yay!  

I am not a professional and all my advice and tips are purely from my own experiences.